Showing posts with label babyjives. Show all posts

Thursday, April 19, 2012

Seeing Stars


 I have been working on a brand new design for Baby Jives Co. and I am so excited to give you a little peek behind the scenes... can you guess what is coming into the store soon?

Monday, December 5, 2011

Who wants love?

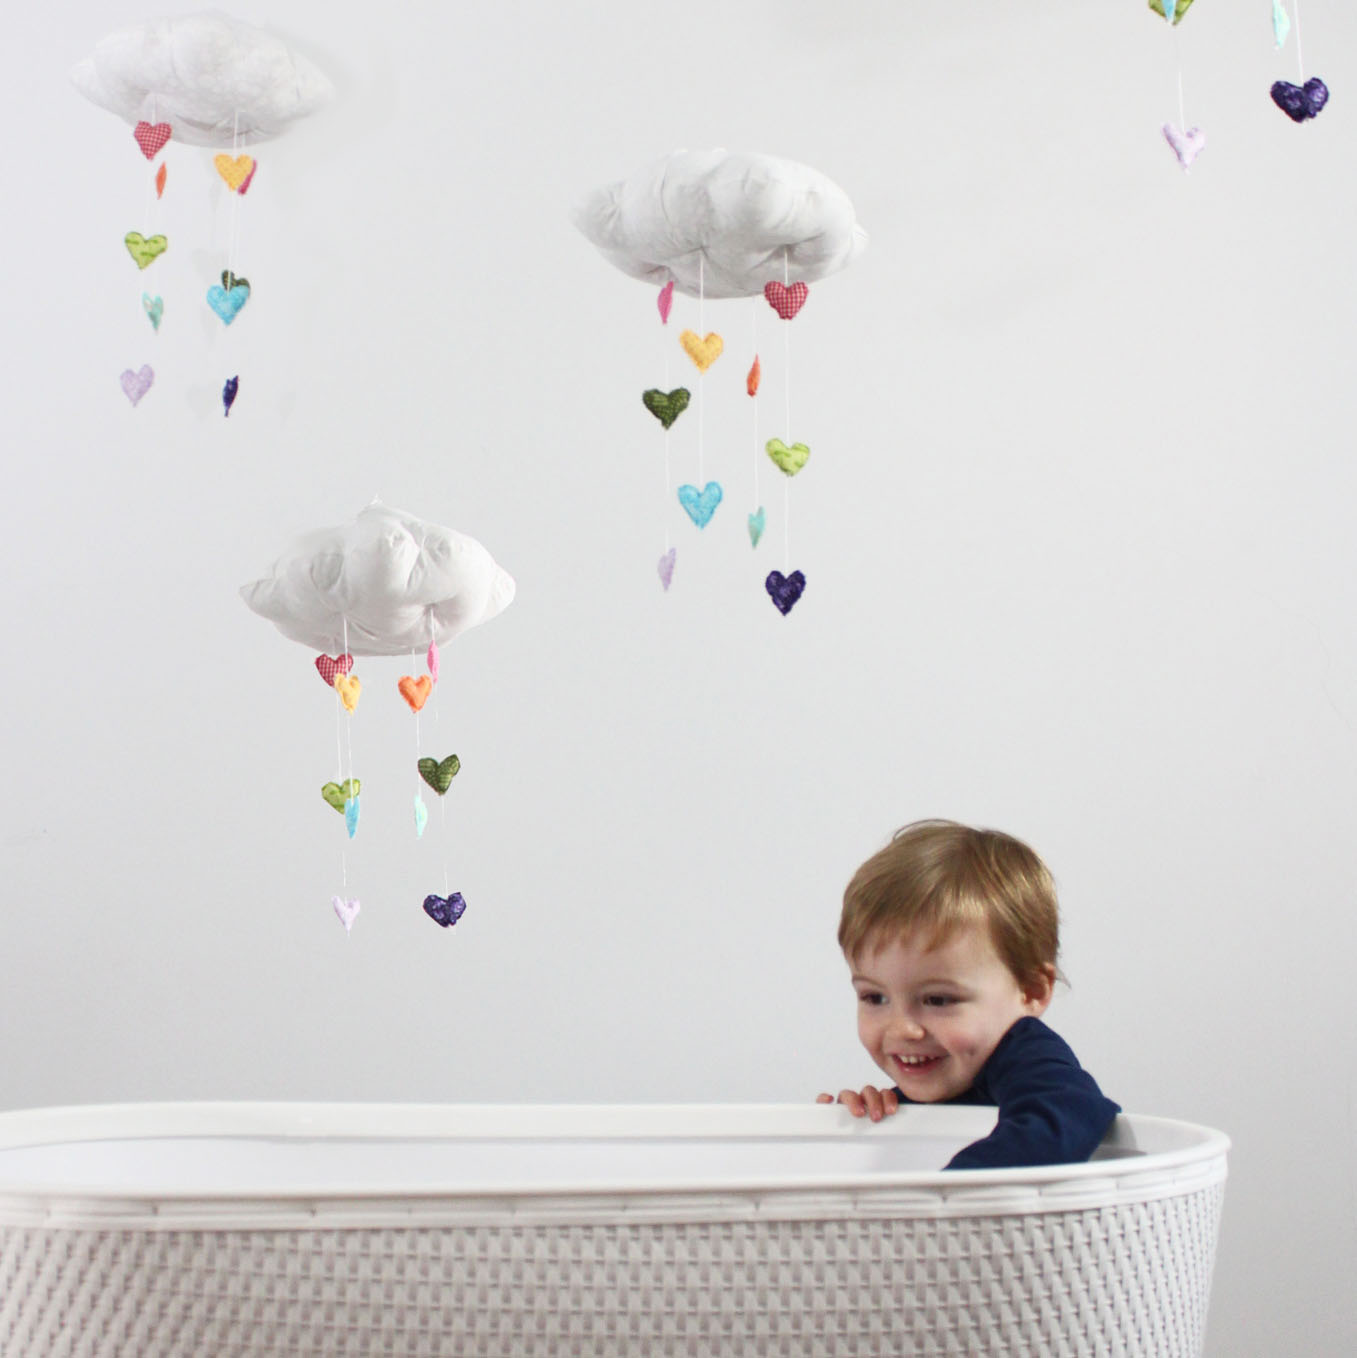
My newest mobile, Showered with Love, is in the shop today and I couldn't be more excited about it.  I have had the idea of making a mobile to shower my little ones with love for a long time now and to see it finally take shape is so rewarding.  We had a lot of fun this weekend doing a photo shoot for the new mobile and I wanted to share a few of the pictures that didn't make it into the listing with you...

I hope he will look this excited once Baby Jives #2 is actually there.
Munching on cranberries and contemplating love.
Here is my quality control expert in action.  It passed inspection.


He did feel very loved there under his special cloud.
 Well that is my behind the scenes peek at the photo shoot for the newest mobile.  It's in my shop now so you can get one for your sweetheart and shower them with love every day. 

xoxo
Jahje

Saturday, December 3, 2011

Inspired by Love


The laughter of a child is something that can fill a heart to the brim with love.  Joy bubbles up and escapes from a wonderful little being.  In our daily life there are so many moments where we are showered with love.  With all this in mind, I have been working on a new mobile design and it is finally ready for the shop. 


Here are a few glimpses from my studio of things taking shape.  Collecting jars of love, which can sometimes be a little rough around the edges.    Then finally assembling them into a mobile that can rain down love everyday.


Now the newest mobile is almost ready for your life.  A way to celebrate love in your home.  It's getting ready for the big reveal...

Tuesday, November 15, 2011

How to make a $7 baby cardigan into a lasting heirloom

Things have been so busy with Baby Jives Co that I have barely had time to consider getting ready for this little one dancing in my belly.  But this weekend I think the nesting bug finally hit me because I just kept having visions of a sweet little cardigan embellished with wool felt flowers and bits of crochet lace.  So I knew I needed to set aside a little time for a fun project.  Oh yeah, did I mention that I also found out that I am having a girl?  Finally I get to think about flowers and embroidery and lace!

So I set out this morning in search of  a plain cardigan to embellish and found a sweet little turquoise one which was just begging to be transformed.  After an hour of work here is what I ended up with:


I loved the results so much that I knew I just had to type up a tutorial for all those semi-crafty ladies out there.  So what follows is a pretty easy project on how to make a $7 cardigan into a $70 heirloom (which is what I am sure you would end up paying at a fancy baby boutique for something similar made by anonymous hands elsewhere in the world).  So what are you waiting for, let's do this!

What you'll need:
plain color baby cardigan (I found a great one at H&M)
2 colors or more of merino wool felt (I prefer this for a durable and washable material)
cotton or silk embroidery thread
crocheted doily which can be cut up (aka won't unravel)
embroidery needle
sewing scissors
disappearing ink pen

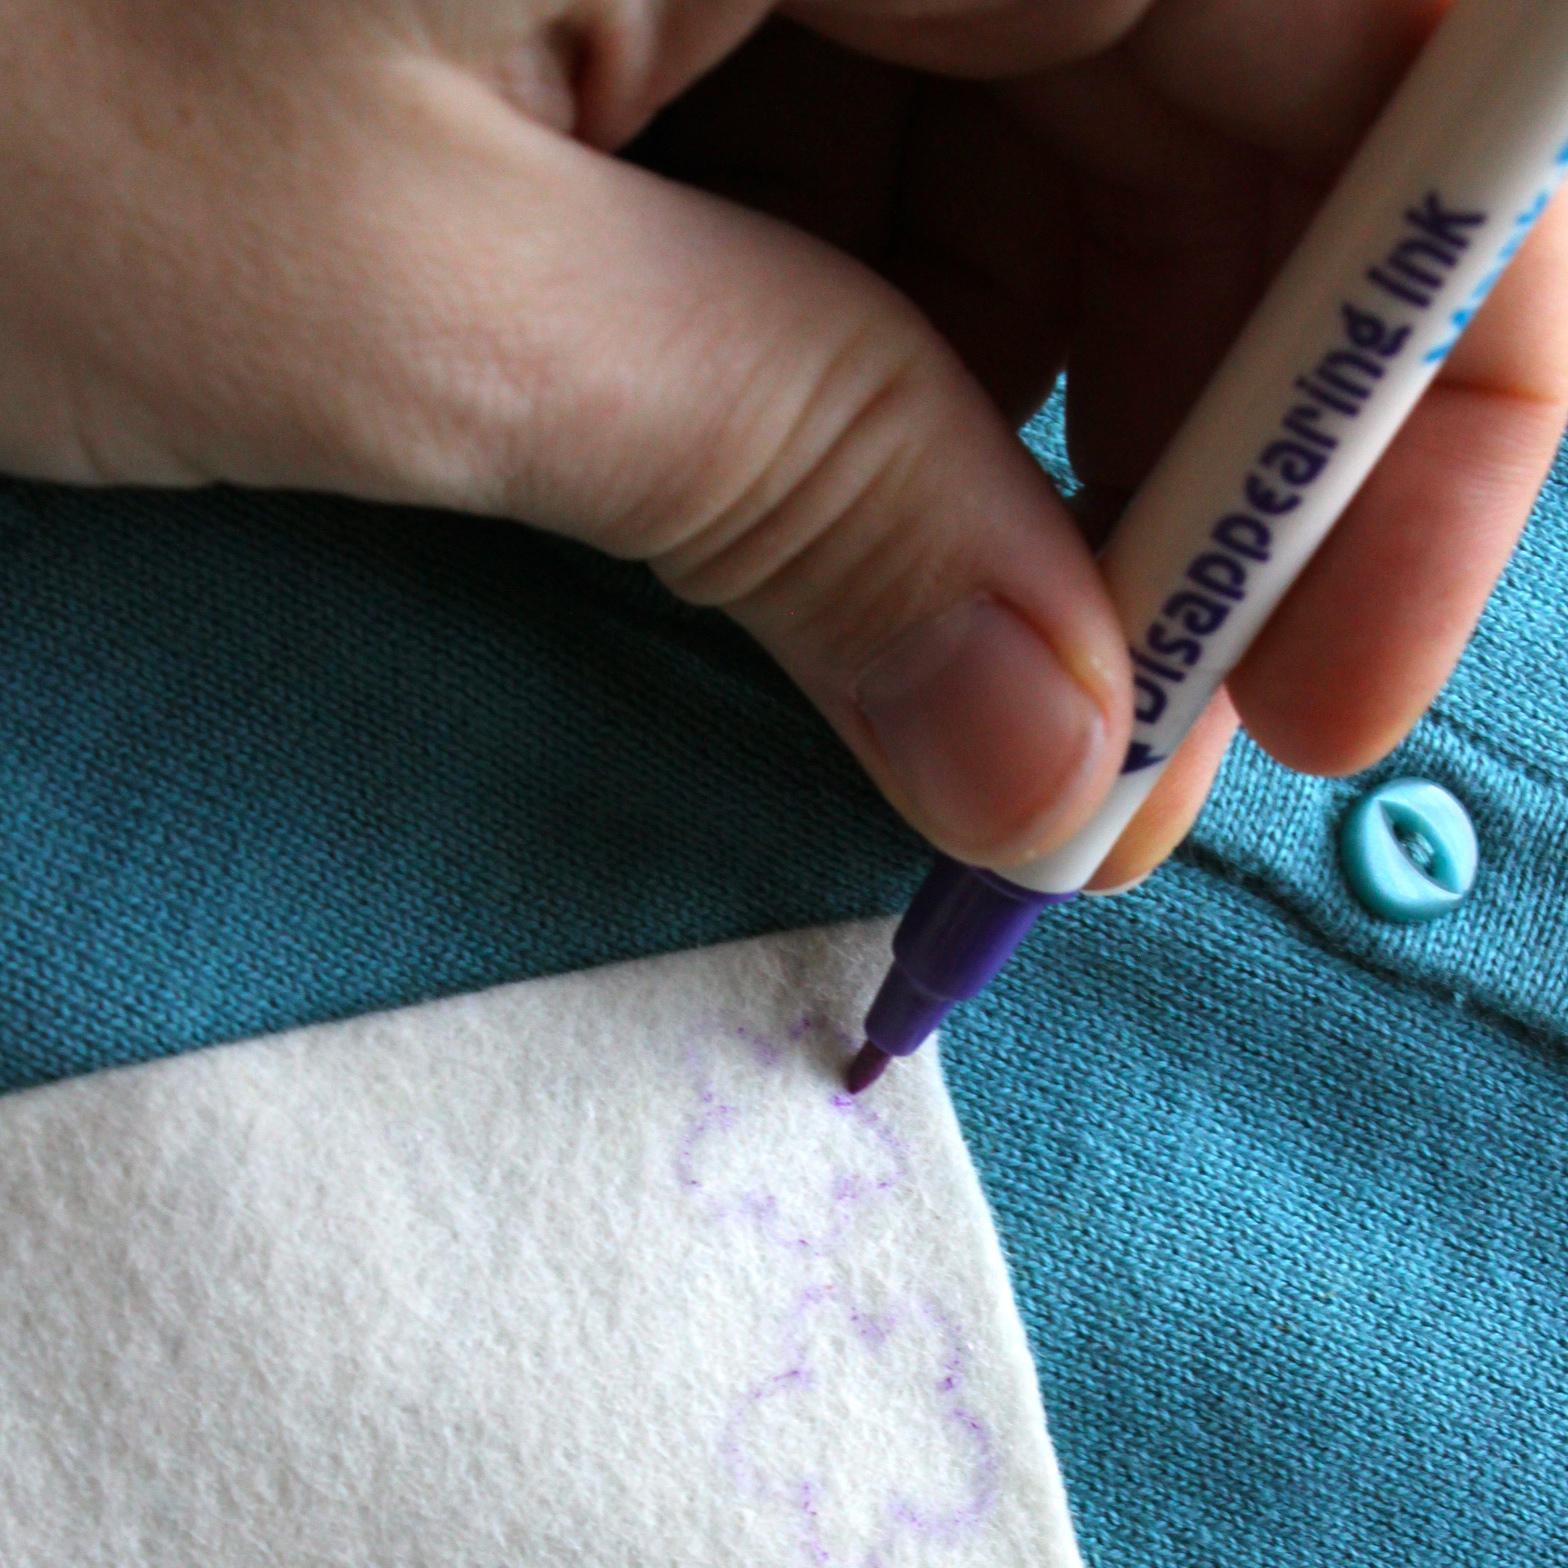
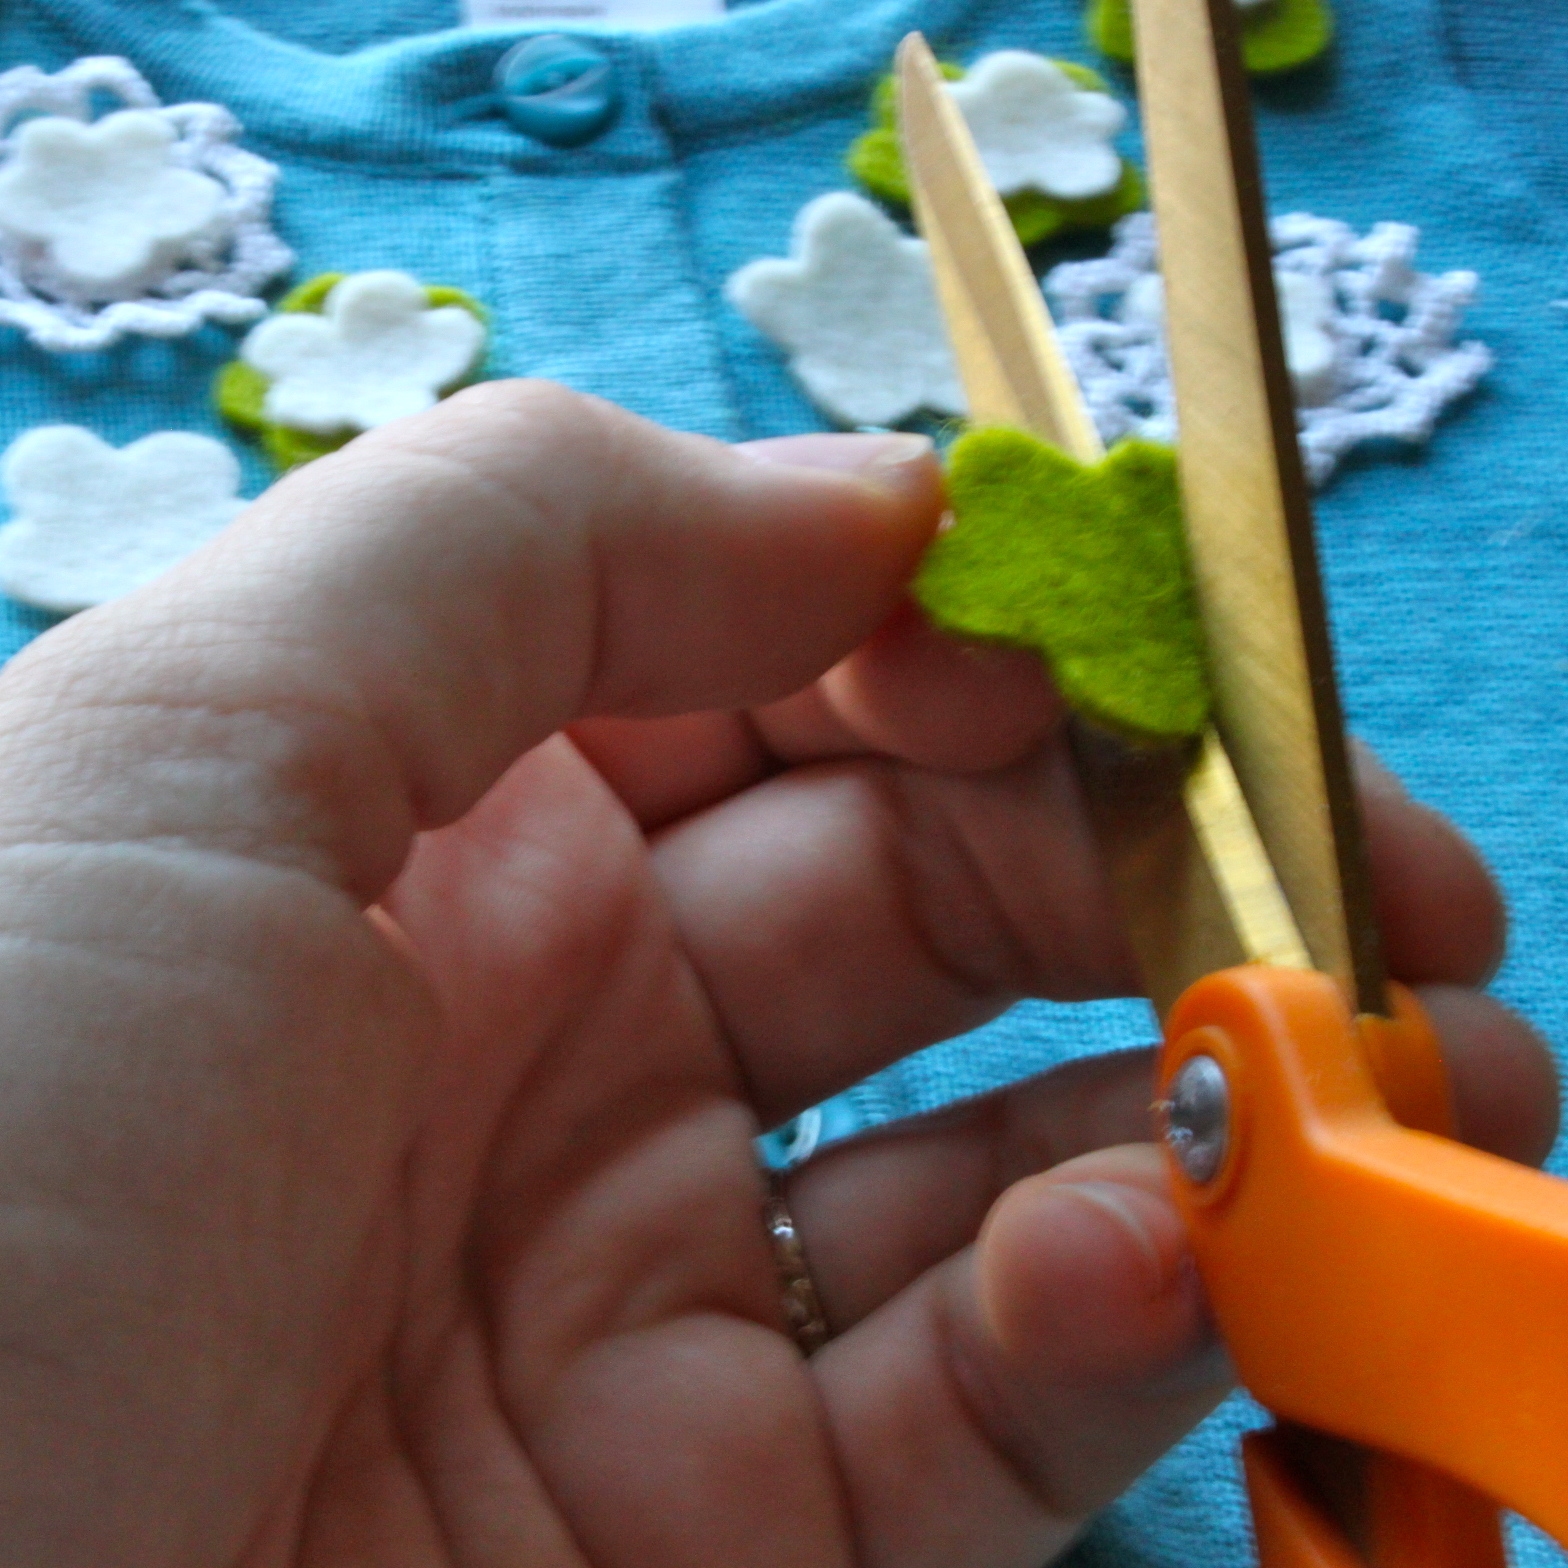
Now you are ready to roll...First sketch flowers with five rounded petals onto wool felt with disappearing ink.  I made mine about the size of a nickel for the flower center and a quarter for the back flower piece.  You will want to make about 7-8 flower pairs depending on the size of your cardigan.  I used 2 different colors of merino wool felt but you can choose as many colors as you want.  Once you have sketched your flowers cut them out with sewing scissors; you can also cut a few leaf shapes too. 


I also chose to incorporate some crocheted lace that I had from a doily.  I cut 2 pieces off and then positioned them on the cardigan with the other felt pieces in a rough arrangement of how I wanted to sew them.  I then took a picture of the arrangement so I could move the pieces to the side but refer to the picture in case things got mixed up (which they did).


Now we are ready to sew.  Thread an embroidery needle, knot the end, and then start with the top flower by the collar.  Stack the 2 felt pieces and then stitch through them with three stitches to make a star shape in the center.  Then using a stem stitch  make your way to the spot for the next flower. 


The next piece to secure was the crocheted medallion.  To secure the crochet stitch around the edge and then place the felt piece in the center and secure it with another star shaped stitch.


Continue along the neck of the cardigan using a stem stitch between flowers to create a loose vine pattern and securing the flowers with a star shaped stitch.  For the few leaves that I included I used a split stitch.  Then when you reach the bottom side of the cardigan secure the thread with a french knot on the inside of the sweater.  Now repeat the process from the top on the other side of the cardigan.


Once finished you will have created an heirloom cardigan which would have cost a heck of a lot more than $7 in a boutique.  So now you can spend that money on some decor for the nursery instead, since that won't be outgrown in 3 months. 


A final note on care, I plan on washing this by hand in cold water and laying it flat to dry.  This will extend the life of the cardigan so I can pack it away once the little lady outgrows it to save it for future generations, mine or hers.


Tuesday, September 13, 2011

Working on something new...Baby Jives #2!

I have been working on something brand new and now I can finally share it with you - I'm pregnant with Baby Jives #2 due in the beginning of March 2012!

Owl Hats by Sweet Love Creates, $34 found via 20BestTwenty
It's been a fun summer filled with vacations, exhaustion, and  morning sickness ... well actually mine was more like anytime but morning sickness as I usually woke up feeling fine.  But now my energy is back and the creativity is flowing so I am looking forward to an intense burst of production leading up to this birth.  My last pregnancy with my son was when I got the idea for starting Baby Jives Co. and now with this one I'm already bursting at the seams with new ideas for Baby Jives Co.  So I am running up to my studio to get sewing...right after I eat this entire box of muffins.  I can't help it, the baby makes me do it!

Friday, June 17, 2011

A year in review or how I got to be one year older

Today is my birthday.  I am not going to tell you how old I am but let's just say I am easing into my mid-thirties. I have to admit that for some reason the thought of my birthday kind of depressed me this year.  I don't know exactly why - maybe it's the fact that I have been struggling with a bunch of teeth issues which makes me feel like, "Gawd my body is not what it used to be" or maybe it's the fact that at my age my mother had 3 kids - one of whom was almost 10 (that's me).  Whatever it was I thought that I would take this day to look back a little on the past year and see how much I have accomplished to get rid of a little bit of that "Whoa is me - I am old" feeling and replace it with some "Wow is me - I am figuring out life". 

Luckily Percy Managed... by Cupcakes and Antlers $5


So I sat down and realized that one of the most amazing things I have done in this past year is to start my own successful home based business.  Never did I think last year when I sat down around this same time to start dreaming up my business that I would have been crossing the threshold of almost 200 sales less than a year later!  When I think of how successful my little dream of making mobiles as artworks has been I am humbled.  I am so thankful to be creating a product I am inspired to make and sending it out into the world with love so that it can be enjoyed by some many other people all around the world.  I feel blessed to be able to stay home with my son and run my business from the playground and during nap times (although I am getting to the point where he is going to have to start sleeping more or I am going to need to stop sleeping at all).  I love being part of a lively community of independent makers and dreamers who inspire me constantly with their commitment to filling the world with handmade goodness, not mass produced nonsense. 

Breath & Smile by the Wheatfield $15


When I realized how lucky I am to be making a living doing what I love and raising both my family and continuing my creative endeavors, that depression started to slip away.  I also got a book about holistically transforming your teeth to start giving my body the same attention that my dreams have gotten this year.  So I look forward to seeing what other amazing things this year will bring and move into my mid-thirties with a hopeful outlook again. 

And to celebrate I am offering free shipping on all purchases at Baby Jives in the US until 6/22- just enter the coupon code "LetEmEatCake" at the checkout and celebrate with me!

Tuesday, June 14, 2011

Love is in the air

This summer it seems like we are planning most of our vacations around weddings.  It's the season for the roses to bloom and love to be declared among the birds and the bees.  So as we are planning out our travel I am also planning out my shopping list of some wonderful gifts I could get these lucky couples.  My husband and I were married pretty young so our wedding registry was somewhat standard, we went to Crate and Barrel and Macys and registered for way too many kitchen implements.  I mean when was the last time I actually used my mini cupcake pans and domed cake server.  Umm, never! 

The gifts that I ended up loving the most from our wedding were the handmade items that people selected for us from artists they knew of.  We have a handmade cutting board that I use almost every day with delight, a set of thrown ceramic nesting bowls that I use for serving up some beautiful meals, and a hand bound leather album that I have our wedding photographs in.  These are the things that years later I truly treasure.  So now whenever I get invited to a wedding I take a look at the registry to get an idea of the couples taste and color sense and then I go and get them a wonderful handmade gift instead.  I've never had any complaints and many folks tell me years after their wedding that our gift was one of their faves.  So here are a few ideas that I have for my friends getting married this summer...

AHeirloom's Vermont Plyboo Cutting Board, $40 found via 20best20
Two of my friends are getting married in Vermont this summer so I thought this would be a perfect gift to celebrate their union there.  A Heirloom also makes boards for all 50 states so they have you covered for a celebration anywhere.

Brookish's LOVE dishtowel, $11 found via 20best20

And this dishtowel could even make doing your dirty work an act of love - or at least remind you that you LOVE is always there to help you out!

Steel Ribbon's Metal Handbag Magazine Rack, $45 found via 20best20
Another couple is a fan of modern design and reads far too many magazines so I think a perfect gift for them might be this playfully elegant magazine rack by Steel Ribbon.

baby Jives' Lovebirds Mobile, $70
And last but not least one of my friends is getting a pair of kissing lovebirds from me to hang in their home.  They were actually the couple who were partly responsible for inspiring this design after a visit with them when they just couldn't stop cuddling and I jokingly called them smitten lovebirds.  So they are getting a little sculpture to hang in their home to celebrate their love.

There are lots more fabulous handmade gift ideas out there to discover at places like Etsy and 20best20 or your local crafty gallery. So don't just buy some bowls from a big box store for your friends, buy them handmade one of a kind bowls made by an independent artisan that they will treasure for years to come.

Wednesday, May 11, 2011

Shared Studio

Like many Etsy sellers I started my business so I could work from home while raising my son.  That means many days my work time is limited to naptime and after bedtime but as my business gets busier I am finding I need to squeeze studio time and little man time into the same space.  Literally, my studio is becoming his play area and it's actually pretty fun to have Gavril in there with me.  So I thought it I would show you around the scenes in my studio and give you an inside glimpse to my business.

Where the magic happens - my Bernina Record
Gavril's driveway / my fabric shelves
piles of dragonflies and butterflies


 Ok, I guess these are more of studio vignettes because if I showed you what my real studio looked like your jaw would drop in horror - it's a mess!  Sharing a space with all my fabrics and my son is not ideal.  He really needs to get a little bit of his own space in there so I have been daydreaming about the perfect studio for both of us.  For him it would include this:

 
The deskhouse by Nine to Nine, found via TwentyBest20
and for me it would include this:

Alphabet Drawers by Kent and London found via TwentyBest20

Tuesday, May 3, 2011

Mother, there is no other

Grandma helping our little guy on his path
 I sometimes think about what my life would be like without my mother being a convenient 45 minute drive away and I have come to the conclusion that it would most definitely SUCK!  She does so much to help me in my week and having her nearby as we raise our son means that he gets to have this amazing relationship with her.  Little man loves going to Grandma and Grandpa's house, it is his vacation spot of choice. She takes my son once a week for an overnight so I can get 36 hours of uninterrupted work time in the studio and squeeze in a weekly date night with my hubby - I know, boy am I LUCKY!  She also sits down with me and talks about motherhood, researched articles on food allergies when I was having issues with my breastmilk, sends me links to sites about child development (not pushily, helpfully), and is always there for a good laugh.

My mother also gave me an amazing gift when I was growing up - the freedom to pursue my own path.    My mother (and father, he's great too) never pushed me to pursue her goals.  She always encouraged my own interests: enrolling me in the art classes I wanted, taking me to soccer practice which I loved, even letting me choose to go to an all Arts college when the time came.  My mother never hounded me about  homework or what extra curricular activities I was going to choose, instead she would ask about my life and let me share what I was interested in.  Even when I got a D in Latin because I figured it was a dead language and why bother learning it, she didn't get mad she simply asked what language I would rather study and told me to pursue that instead (which solved the D - always got A's in Spanish and still use it to this day).  I also believe that without my mother I would not have had the confidence to start my own business and pursue a dream.  She is my biggest cheerleader in this whole venture and when told me the other night how proud she was of how I have realized my vision it was one of the my best moments yet.

So this week I wanted to say thank you to my mother for helping me keep sanity in my life and allowing me the freedom to pursue my own path - there is no other!  Without her my growing empire would not be possible.

How about you - what makes your mother equal to no other?
I would love to hear your stories!

Friday, April 29, 2011

A little home for here

I think it may be the fact that spring is finally here but somehow I am stuck on the idea of a nice neat house, which mine is NOT!  So I am embarking on a virtual spring cleaning - meaning I found nice things that I would love to bring into my home to impart a little more order into my chaos.  I don't have the time to clean up yet since I am getting ready for my booth at Art Star Craft Bazaar in 2 weeks but after the show maybe I will reward myself with a clean house and a new goodie to help keep me organized and comfy.  Here's a few of my ideas...

Wolf Den Coat Rack by Cantilever and Press $245


Animal Index by Charles and Marie, $27


Log Pile Cushion by Roddy and Ginger, $40


So now I need to go clean my house so I can get myself a nice little reward to spruce it back up again. 
Items found via 20 Best Twenty

Tuesday, April 26, 2011

Butterflies to wear

A butterfly I can wear...
Did I ever tell you I used to be a jeweler?  Well, in a previous life I made things to wear and lately as I sit surrounded by piles of lovely butterflies I find myself picking them up and wanting to wear them.  So this week I gave myself a sliver of free time to play and presto - a new necklace for myself.  I am loving it, especially since it weighs absolutely nothing, is made from the softest jersey, and I can throw it on with one of my plain shirts and make any outfit into something special.  I am working on a little collection of them for the Art Star Bazaar next month - something fun for the ladies to buy for themselves.  So what do you think? 

Friday, April 8, 2011

Nice 'a meet you!

I have been wanting to make a video for a while now to show people how my mobiles move and tell you a little more about my work but I was avoiding doing so because I knew that I would need to get up in front of a camera and talk to do so.  So please watch the mobiles and pay no attention to the woman awkwardly fussing with her hair. 

BONUS: If you watch it all the way through you get a sneak peek of something new that will be in the shop next month.... So grab your kid and watch some YouTube.  It won't be as flashy as that video about "lots and lots of firetrucks" (parents you know what I am talking about) but i think you may enjoy it!

Tuesday, March 22, 2011

Wowza, I am a Babble Top 50 Etsy Baby Shop!

So today I get to share some pretty awesome news with you: I have been selected as a Babble top 50 Etsy Baby Shop!  I am completely honored to be selected along with the other 50 talented Etsy sellers who create amazing handmade items for kids.  If you haven't seen it visit Babble and take a look at the Babble Top 50 Etsy Baby Shops. I have already found some wonderful folks that I didn't know about including the store Apericots where I bought a fantastically cute shirt for my little guy. 

Ps. this is why I did that photo shoot although I wish I had sent them a different shot - this one just seems a little smug...oh well, you know I'm just a big goof!

Friday, March 11, 2011

Spring in my Studio


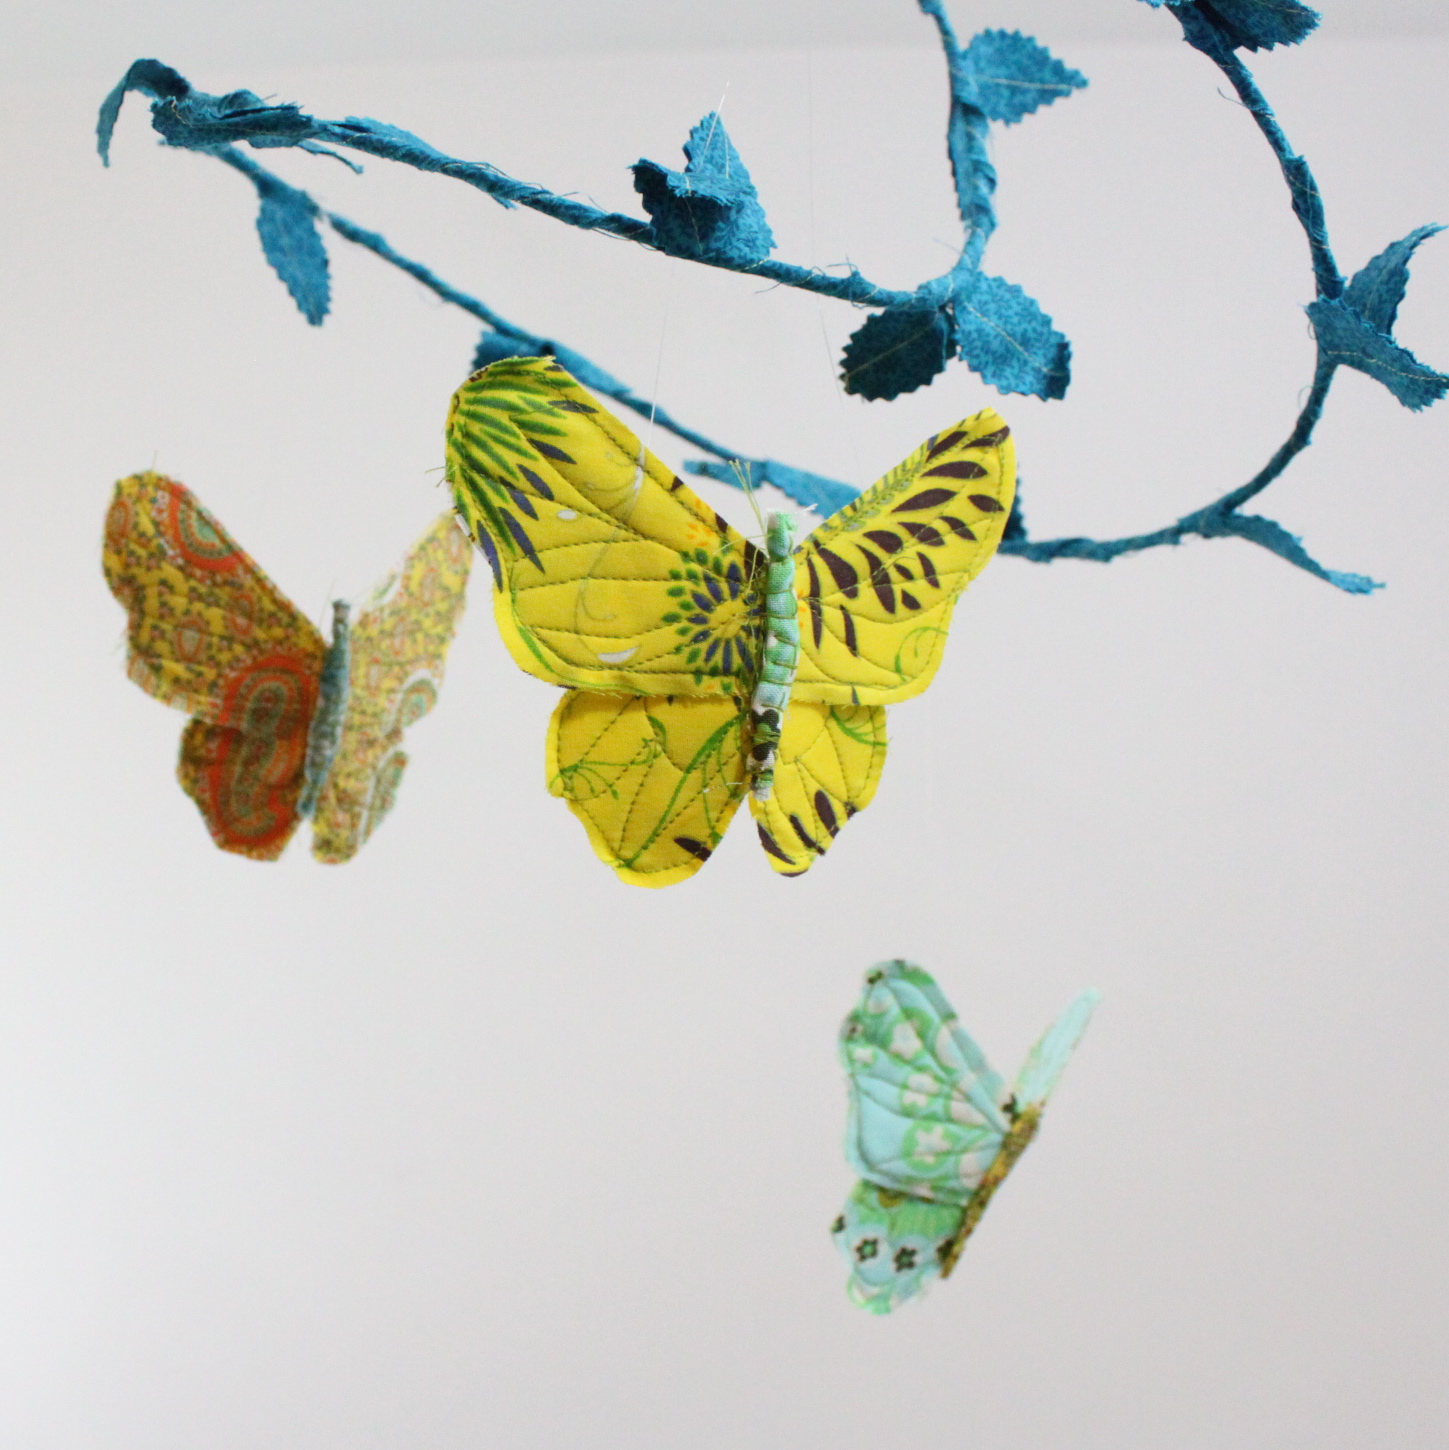
It's almost Spring!!! I am so excited and can't wait to be back in my garden running around with my son and planting new flowers.  In anticipation I have designed another new mobile this spring featuring my favorite fluttering friends - butterflies!  I've had them posted in the shop for a few weeks now but am just now getting to posting pictures of them here.  I hope you enjoy them as much as I do - I even did a little photo shoot with them and it felt like Spring had finally arrived!

Monday, January 17, 2011

Valentine's Day Felt Cookies Tutorial

A finished plate of cookies for someone sweet in my life
My son is a winter baby and his birthday is fast approaching so this year after the rush of Christmas I actually have a little free time to make something besides mobiles.  The result: new playfood for my little sweetheart.

Since I am still running high on the holiday spirit I figured I would also share a tutorial with everyone so you can stitch up a batch of lovely valentine cookies for someone sweet in your life too.  This is a super easy tutorial that only uses a running stitch. If you don't know what it is here is a link to a tutorial by Wendi Gratz showing her doing a running stitch (that is the stitch that you teach kids with lacing boards, really!). 


So here is what you will need:

1 piece of red or dark pink colored felt
2 pieces of oatmeal or tan colored felt (I got mine from Etsy)
light pink embroidery floss
polyfill 
pattern making paper or tracing paper
pinking shears
regular shears
embroidery needle (not shown above - oops!)
sewing pins  (not shown above - oops!)

Let's get started:

1. Fold your pattern paper or tracing paper in half and cut out half a heart.  Think back to making valentines in 2nd Grade - you know how to do this!

2. Pin your heart pattern onto your red felt and cut around the edges of the heart with your regular shears.

3. Pin your heart pattern on top of your 2 pieces of tan felt which you have stacked and cut around the edges of the heart with your pinking shears.  Follow the edge, don't cut into the paper.

4. Separate your tan felt pieces and fold 1 piece in half along the center line.  Cut a smaller heart into this piece to create a hollow center (see photo below of finished pieces).


 Now you have all your pieces cut out and you are ready to start stitching.  I did this all by hand but if you are in a hurry you could do this on your sewing machine instead, you just won't get the nice embroidery detailing.


5. Pin your top cookie piece to your middle red heart layer and pull your embroidery floss through from the red piece up through the tan piece so that the knot will be under the red (and won't show).  Now sew around the edge of the heart window with a running stitch (see this tutorial for refresher).

6. Once you are done it should look like this.  Now get your other cookie piece (the one without a heart cut into it) and place it beneath and pin all three layers together.


7. With all 3 layer pinned together - start a new length of embroidery thread from under the red layer and pull through to the front tan piece so your knot will be hidden inside the cookie.  Sew all three layers together with a running stitch around the edge approximately 1/4 inch from the edge.

8.  When you are a few inches from where you started your stitch at the center take a little bit of polyfill (one small handful worth) and place it in the heart.  Then continue your running stitch around the remainder of the edge.

9.  Wrap the thread around your needle and pull the needle through to make a knot.  Then pull the knot into the heart and clip the thread so it will not be seen.

You are done!  You now have a beautiful heart cookie to share with someone special in your life.

Tuesday, November 30, 2010

A Woodland Wonderland Mural for Samantha


After the tofurkey was done and the presents were bought on Etsy, Joe and I geared up to paint a mural for a very special little girl here in Philadelphia.  So after 2 days of hard work I am excited to present to you the final pictures from Samantha's Woodland Wonderland.  Filled with little animal families, this mural got the seal of approval from Samantha when she toddled into the room and started going around with a huge smile saying "Mommy - Babeee" and petting all her new friends.